

Let’s say you’re a journalist and you want to record an important event taking place over an extended period, say 12 to 72 hours. Or even a week, or longer. If you want to record the event with video, that’s far too long to expect anyone to watch it in its entirety.
You can, however, record the whole thing and use some kind of time compression in post-production software. But if you’re recording on high definition video, you can only expect to record about four hours on a 32 gigabyte SD card. Even if you manage to capture 12 or 72 hours of high-definition video using a hard drive, it’s going to be hard to work with such a big file.
The solution is time-lapse photography, which simply means taking photos at regular intervals and turning them into individual frames on a video. During hurricane Sandy, a number of news sites and tech-savvy citizens used a time-lapse photography to document the storm's impact on New York City (below). If you’re not in a hurricane-prone area, you can find other weather-related applications for this technique, such as recording a flood-prone area during a storm.
Of course, you could just as easily record important non-weather events, such as big construction projects, or traffic on a bottlenecked road. Compressing these large-scale but slow-moving events into a one or two-minute clip makes for dramatic video.
At its most basic, you only need two things to pull off a time-lapse video. You’ll at least need a camera equipped with an intervalmeter (a fancy way of saying it can be programmed to take photos at regular intervals), and software to turn the photos into videos.
A camera battery will only last so long, though. If you’re hoping to capture an event longer than three hours, you’ll probably have to rig up an external power supply. This power supply can be as simple as a motorcycle battery hooked up to a voltage regulator, or it can be a sophisticated, computer-controlled lithium polymer setup with photovoltaic (solar) cells. Then there’s the matter of finding a memory card of sufficient size, and a mounting solution with sufficient stability.
Simple is better. If you’ve got drone journalism equipment lying around as I do, you likely already have all the requisite components to make a great time-lapse video. The following is a breakdown of my own experiment in time-lapse photography, which you can replicate or modify to suit your own needs.
PARAMETERS
First thing’s first: how long should I run the camera? This will have an impact on all other parameters for the experiment.
Six hours seems like a good starting point. This is enough time to generate a decent projection on how much battery capacity you’d need to run the camera for 12 or 24 hours.
Fortunately we’re not flying in the dark when it comes to battery capacity. The stock battery for the camera we’re using, a GoPro Hero2, has a capacity of 1100 milliamp hours (1100 mAh). GoPro advertises that the camera can run for 2.5 hours on this battery, giving us a rough estimate of power consumption: 440 milliamps per hour.
Judging by the talk on forums, there is perhaps an increase of 100 mA/h if the camera is on video mode. We're taking still photos via intervalmeter, though.
To run this camera for six hours, we’d need a battery with a minimum capacity of at least 2640 mAh. But since we’re using lithium polymer batteries, we need at least 3300 mAh. That’s because if you drain a lithium polymer pack below 80 percent of its rated capacity, you’re likely to damage the battery (2640 / 0.8).
Now that we have duration figured out, how much data are we actually collecting?

If we set this camera up to take a photo every second for six hours, we’d end up having 21,600 photos. A single 11Mpx image can be expected to take 3.5MB of storage space. Therefore, six hours of photos taken at a rate of one photo a second would require 75,600MB, or about 75GB of data.
The biggest SD card I have at my disposal is 32GB, so that’s not an option. But there’s another problem with collecting so many images, and that relates to the total time of the video.
Most videos have a speed between 24 and 30 frames per second. Video games typically operate at a much higher frame rate, perhaps 60 FPS or higher, but motion pictures operate on a different standard (24 FPS). Let’s say we’re zipping by at 30 FPS. Our time-lapse video would take 720 seconds, or about 12 minutes.

A run time of 12 minutes is not ideal for a web video, and all the stills and the HD video itself would take up a chunk of space. But let’s say we only take one still every 30 seconds. We’d end up with 720 photos. This would only require 2,520MB, or about 2.5GB. That’s very doable.
Keeping with that 30 FPS rate, I’d end up with a 24 second video. That’s pretty short, but we can slow the rate down to 25 FPS and get almost 29 seconds out of the time lapse. I think that’s a good goal for this first experiment.
To recap, here are the specs I’m working with:
Duration: 6h
Interval: 30s
Storage space: 2.5GB
Video frame rate: 25fps
Video length: 28.8s
Consumption rate: 440mA/h
Power consumption: 2640mAh
Min. battery capacity: 3300mAh
EQUIPMENT
Here’s a short equipment list for my version of a TL setup, which makes use of easy-to-source drone components:
1) GoPro Hero2 HD Camera

There are cheaper options for high definition cameras, but few are as versatile. This camera is small and light enough to be mounted to a drone or aerial surveying balloon. It will record HD video, but it can just as easily be programmed to take 10Mpx stills via intervalmeter.
It comes with a number of useful accessories, such as a waterproof case, and several bits of hardware that will help you mount the camera – even to vertical surfaces.
GoPro now makes the Hero3, which can stream images over Wifi (ostensibly to a computer hard drive). The Hero3 is superior to the Hero2, but you could pull off a time-lapse even with the first version of the Hero.
2) 5000mAh 4S Lithium Polymer battery

Lithium Polymer batteries have many fine qualities. Unlike nickel-cadmium batteries, they hold a charge longer, they are much more tolerant to cold weather, and weigh much less for the capacity. That’s why I use them on the DroneJournalism.org and EnLiST Drones for Schools drones. The GoPro camera actually has its own lithium polymer battery, but it’s only a fifth of the capacity, and one fourth the voltage. The stock battery won’t record a day-long event, but this will.
LiPo battery packs come in a variety of capacities and voltages (each cell puts out about 4.2 volts, and you can get packs with 6 or more cells). Five amp hours (or 5000 miliamp hours) is a decent capacity for starters, but to be frank, 4 cells is a little excessive for this application.
3) Electronic Speed Controller

Plug a 4 cell lithium battery straight into a GoPro, and you’ll get a puff of smoke and a fancy paperweight. That’s because the camera is designed to charge via the USB standard, which supplies just 5 volts through the USB port.
The challenge is getting the voltage down to an acceptable level. Fortunately, drones use voltage regulators to control the power from the lithium cells to the electric motor. These are called electronic speed controllers (ESC). Some of these speed controllers also have a separate connector to supply power to the drone’s radio equipment and autopilot, and it just so happens that most of this equipment runs on 5 volts – the same voltage that the GoPro uses.
For this application, I used a 10 amp ESC that could handle up to 10 lithium cells.
4) Time-lapse software

PhotoLapse 3 is a free, Java-based program that can take string your still images together to make a movie. You can select the frame rate, from 1 frame per second up to 30, but you don’t have a choice in the format of the exported video (which is AVI).
Boxsoft TimeStamp is not a freeware program, but it does have a free trial period. The idea is to place a time stamp on each image. You can configure this app to add the time stamp in various locations on the photos, with your choice of colors and fonts. It isn’t required for time-lapse photography, but it does help add a frame of reference for your viewers as to how quickly time is flying by.
SETUP
The power supply really is the most important component in any TL setup. It won’t matter how great your images are if you can’t collect enough of them. To make sure the GoPro has adequate power throughout the data collection period, it’s imperative to make a good connection from the camera to the power supply.
When everything is running properly, the GoPro will draw current from the power supply and keep the charge in its internal battery. That battery will act like a large electricity-smoothing capacitor.
The GoPro accepts a male mini USB type B connector, but the stock case for the GoPro blocks access to the port. It’s necessary to use a powered hand tool to bore out a hole in the case to permit access to the USB port.

Note: Do not use a computer to supply power for your TL project. The GoPro will know the difference between a connection to a power supply and a connection to a computer, and when the camera is plugged into a computer, it will not take photos or videos.
To get the voltage to the USB port, I had to clip off the normal-sized male USB connector and shred apart the cable to locate the wires dedicated to voltage (the red wire) and ground (the black wire). All other wires are used for communication (a green wire for data- and a white wire for data+) and are superfluous for this application; it’s best to seal the tips of those wires with heat shrink and electric tape.

Case selection for the power supply is not a trivial matter. It must be heavy enough to not blow away in the wind, or it must be large enough in which to place some heavy items (cinder blocks, bricks, and/or steel chains are all good options to add weight and stability). It must be water-tight, but also allow easy access to the batteries.
The GoPro can be attached almost anywhere, but I find it best to attach the camera directly to the power supply case. This adds weight to the base, and makes it easy to transport everything and keep track of your camera mounting hardware. For this application, I used an ABS project case from Radio Shack, and drilled a hole in the lid to feed the USB cable into the case. I also attached the 3M mounting pads to the top of the case, making it easy to attach the camera and case.
With the USB cord through the hole in the case lid, I found a connector to match the 5v output connectors from the voltage regulator (which are nothing more than standard servo connectors), and soldered the USB power lines to the appropriate power lines on the new connector. It’s important to solder on the connector while the USB cord is on the inside of the case, otherwise it’s necessary to drill a larger hole for both the cable and connector.
I secured both the voltage regulator and battery inside the project case using electric tape. The only thing remaining was to connect the camera to the USB cable, connect the USB cable to the voltage regulator, and the voltage regulator, close up the case, and seal everything with electrical tape and silicone gel.

Note: once these items are connected, power will begin flowing to the GoPro, and the LiPo battery will begin to be depleted. Depending on the kind of silicone you use, it might take two hours for the sealant to cure. If you’re intending to set the camera out in the middle of a rainstorm, this could mean some wasted time and battery while you’re waiting indoors for the silicone to set up. The best solution to this problem is to seal everything up and deploy the camera least a couple of hours before rain is expected.
EXECUTION
For this test run, I simply set up the camera to take images at a 2-second interval and placed it on a stable platform outside (my propane grill, actually). The forecast called for mild weather, so no silicone was used. The GoPro ran on the power supply from 2:50pm to 8:24pm, at which point I took the camera inside to extract the card and create the time-lapse video.
The first thing I noticed when I opened the case for the power supply was how warm everything was. The box smelled faintly of burning rubber. Speed controllers give off a great deal of heat, especially when they’re regulating voltage to high-amp electric motors. Larger ESCs dissipate this heat with large metal heat sinks, but heat doesn’t usually become an issue on drones when there’s adequate ventilation.
Yet this application required an airtight container for the power supply, meaning the heat was building up over the 5 hours and 34 minutes the camera was running. Heat didn’t cause the ESC to fail, but it was obvious that it could be an issue for longer deployments. Heat also indicated that energy was wasted, meaning this system was less than efficient.
Recharging the battery revealed how much battery capacity was used. This number was essential to calculate if my assumption about the 440mAh consumption rate of the GoPro was correct. And indeed, these calculations showed the GoPro eating about 440 milliamps per hour. The battery could have kept the GoPro running for another 3 hours.
The 600 photos taken by the camera were run through Boxsoft Time Stamp, and then through PhotoLapse 3 at a rate of 25 frames per second. That compressed this 5 and a half hour period of time down to 23 seconds.
The resulting video isn’t very exciting. There’s a squirrel that makes its way across the back yard at about 17:30, but that’s about it. It does serve as a proof of concept, though.
IMPROVEMENTS
This time-lapse photography system can be improved. Here are the biggest things I thought could be better engineered:
1) Change from an electronic speed controller (ESC) to a battery elimination circuit (BEC).
Both speed controllers and BECs are voltage regulators. They control how much electricity flows from the battery to the rest of the equipment. But the key difference here is that ESCs primarily are meant to supply power to motors, while BECs are meant to only supply power to ancillary control devices (radios, servos, computers, cameras, etc.).
Some ESCs, especially speed controllers that don’t supply a lot of amps, do supply power to ancillary control devices. This is convenient, because low-amp applications are usually lightweight applications where you don’t want the added mass of a secondary power system just for servos or radios.
When you step up to bigger, higher-amp drones, it makes sense to have separate power systems for the main motor and ancillary devices. This is an occasion where you use a BEC to power everything besides the motor. The separate power system is especially handy if the ESC burns out from a high current load, because the drone pilot will still be able to guide the drone to a “dead stick” landing. Bigger drones also tend to be more expensive drones, so the BEC and secondary power system serves as an insurance policy.
Why is it better to use a BEC than an ESC? BECs are engineered to handle much smaller current loads and thus have less resistance. Less resistance means less energy loss through heat, and more power for the camera. They also aren’t required to modulate voltage from a digital signal like the ESCs. BECs, being less complicated, are at least half the cost of an ESC, if not less.
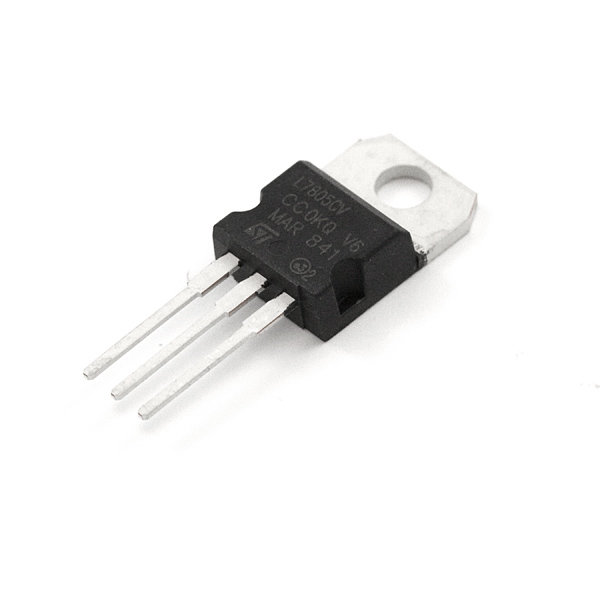
The best voltage regulation option, however, might be a humble voltage regulation IC (like the above one, offered by Sparkfun). These chips cost only a few dollars, and also put out a reliable 5 volts. Our ethos here, though, is that we’re repurposing drone equipment we already have, and trying to keep extra purchases to a minimum.
2) Engineer a way to dissipate heat.
It seemed like heat buildup could be an issue with this current setup. During the cold of winter, this might not actually be a problem. But let’s assume that this would be used on the hottest day of the year.
We need to get rid of the heat while still having an airtight container. The easiest way to dissipate heat would be to cut a hole in the box, attach a metal heat sink on the outside of the box, and attach the voltage regulator to the back of the heat sink, on the inside of the box.
Make sure there is a tight seal between the heat sink and the box, and that thermal paste is providing a good connection between the voltage regulator and the heat sink.
3) Use a two-cell LiPo battery instead of a four-cell LiPo.
Due to Ohm’s law, anytime you need to reduce voltage in a circuit, you need to add resistance. And any time you add resistance, you expend energy via heat. Any time you expend energy via heat, you are wasting energy. So it follows that the less voltage you have to resist, the more efficient your system will become.
The ideal solution is a two cell LiPo battery, which should supply about 8.4 volts when fully charged. You can then increase the capacity of the battery to your desired specification, or use any combination of two-cell batteries in series to increase the capacity of the entire system.
If you were purchasing LiPo batters with the explicit purpose of supplying power to a time-lapse camera, this would be a wise choice. But again, we’re re-purposing drone equipment, not purchasing additional equipment. Large-capacity batteries are typically purchased with four or more cells, because that’s the minimum voltage you likely need to drive a motor to generate enough thrust to get a medium-sized drone airborne.
There you have it: a time-lapse photography system using drone equipment.
If you do decide to set up a similar system, please send me an email and tell me about your experience. I am not, however, a tech support associate, so I may not be able to resolve any issues you have. Follow this guide at your own risk.