
When JournoDrone One met its end last month, taking one final dive into the grass and shattering into foamy bits, it dashed the hopes of DroneJournalism.org developers of an easy solution to drone journalism. However, we were well aware that this enterprise had a learning curve. And we did have some measure of success, and learned some valuable lessons that will help us and other drone journalists in the future.
We can say for certain that the drone flew. It didn’t fly very high – 12 feet or so – or for very long – perhaps 5 seconds at most. But it did fly.
Above is the only on-board footage of the first and only flight of JournoDrone One. For most of the video, the shadow of the drone’s nose is visible in the bottom of the image, except for the last few seconds when the drone lifts off. That’s when the image starts to bob and weave, because there’s no longer wheels and landing gear keeping the craft stable.
Only one minute and eight seconds could be recovered from the GoPro HD camera mounted to the bottom of the craft. That’s because I maneuvered the aircraft with very little altitude, and inadvertently sent it in a downward trajectory. Upon impact, the GoPro separated from its mounting case and ejected its SD card before it had a chance to write the remainder of the flight to the card. This also corrupted the file, and so a freeware program was used to recover what little footage the GoPro managed to record.
What went into the drone, and what did I get out of it? Here’s the details.
Breakdown of the Buildup
JournoDrone One began life as a foam glider called the "AXN CloudsFly," sometimes marketed as "Floater Jet." This powered glider has a 1.29-meter wingspan and a length of 0.86 meters. It shipped with a 2100kV motor already installed, which I complemented with a 20A Electronic Speed Controller (ESC) and a 2200mAh 3S LiPoly battery. Additionally four servos (one each for the elevator and rudder, and one for each wing's aileron) and a radio receiver and transmitter were required for operation.
The preferred started RC plane for the DIYDrones.com community seems to be the MultiPlex Easy Star. It's a robust plane with room to spare for the Arduino-based autopilot that the community frequently uses. Although it has smaller on-board storage, the CloudsFly had the added advantage of elevators. Some on FPV message boards mentioned that the CloudsFly was easier to pilot, as well.
In addition, there were numerous online guides and threads on message boards made by people who were experienced with this model of powered glider. The AXN Clouds Fly Wiki not only had information about stock setup, but also listed tested and successful modifications to strengthen the airframe. An extensive, 3-part series on YouTube walks through the basic assembly of the aircraft and also makes recommendations for setup and mods.
 |
| The "Clouds Fly" out of the box for the first time. |

A Word on Aesthetics
 |
| JD-01 in classic primer grey, with hand-painted URL on the wing. This photo was taken before the drone's first outing. |
I removed all the stock decals, which came off fairly easy with the assistance of a hair dryer. Then I gave everything a coat of Minwax Polycrylic, which I read would prevent the foam from melting when sprayed with paint (most spray paints contain propellants which will dissolve most types of foam), as well as enhance the rigidity of the aircraft.
I used a foam brush to apply the Polycrylic out of the can. When it dried, I then sprayed everything standard grey automotive primer. This was a no-frills paint job, and I wanted the color of the plane to reflect its current state of development.
While the Polycrylic provided a good surface to paint, and didn't add much weight to the craft, it most certainly did not make the plane more crash-resistant. A significant amount of paint and Polycrylic flaked off from anything but light handling. Attempts at masking certain parts of the aircraft in blue tape to paint designs resulted in the primer and Polycrylic coming off together, although this could be attributed to the qualities of the primer (a good primer theoretically should be susceptible to bonding as such).
Some RC forums recommend using cement-like coatings that went on thicker and required sanding afterward. While that may provide a good look for an impressive scale jet, I do not think it would be practical for a "workhorse" like a journalism drone.
For my next drone, if I should paint it at all, I would invest in a small, cheap spray gun and use common latex paint. Paint in aerosol cans are an expensive investment over several projects, and as mentioned before, the propellant can melt foam. Meanwhile, a spray gun can be cleaned and re-used after each use. Latex paint cleans up easy, it's available at almost every hardware store and in a near infinite number of color combinations. It also flexes better and is less likely to crack and flake, is resistant to many chemicals, and does not react with the foam beneath it.
Modifying for Stability and Transport
 |
| How the wings normally join together inside the glider. |
During the first crash of the drone, the wings had separated. So one of the first modifications I had made was to ensure the wings would stay together in-flight, and in the event of a crash.
The glider kit included a hallow carbon fiber tube that spanned most of the length of the two wings. This tube was designed to nestle in a groove on the underside of each wing, and the whole thing was to be glued and secured with a foam flap. As stated before, this would prevent the wing from being broken down for transport.
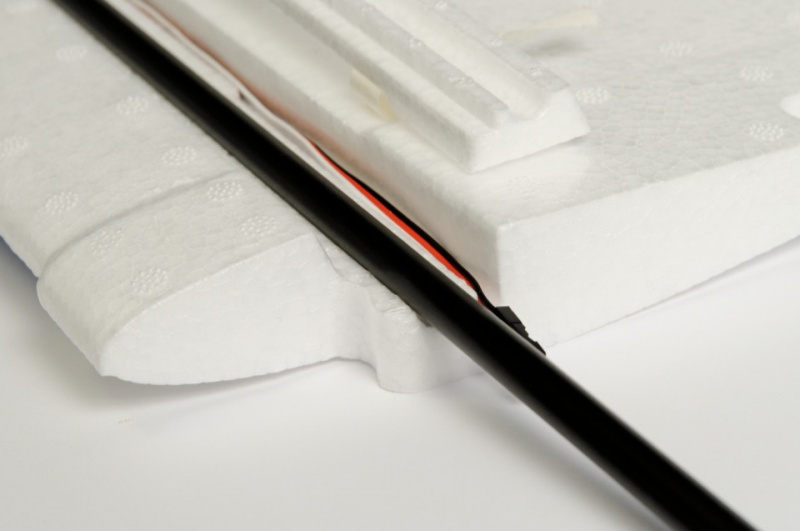 |
| Photo of the CF tube on the underside of the wing, courtesy of the Clouds Fly Wiki. The foam flap to secure the CF rod also is pictured. |
Thus, when the wing flexed, it would still flex against a solid structure of carbon fiber, and that structure was secured to the wings. But when it came time to break the kit down at the end of the day, the wings would detach and the rod would slide out.
While this method proved effective for strengthening the wing, some modifications were still needed to ensure the wings would not try to separate from each other during flight. I found a common solution to this in the CloudsFly Wiki and elsewhere, in the form of cheap, disposable plastic wall hooks, and "hook and loop" tape (commonly known as Velcro).
 |
| These are common plastic wall hooks with adhesive strips -- they can be found everywhere from supermarkets, to hardware and office supply stores. |
 | ||
| Wall hooks attached to each wing. Note the orientation and the foam exposed after sanding. Also note the placement of the hook and loop, which I'll explain later. |
To give the adhesive for the hooks a proper surface to bond to, I sanded through the primer and Polycrylic coating down to the original foam. Additionally, I scuffed the bottom of each plastic hook to prepare those surfaces as well.
Pre-flight, several rubber bands are draped over the top of the fuselage and held by the hooks. In addition to providing elastic strength to keep the wings joined together, I found that it has the added benefit of making the joined wings more rigid.
There are some variations of using elastic bands to secure wings to scale RC aircraft. One of the more common methods uses a rigid post that protrudes from either side of the fuselage, under the wing. In that configuration, the elastic band is placed over the top of the wing and fuselage, and is held against the post. I opted for the hook-and-band method because I believed puncturing the soft, foam fuselage with a strong post was risky and unnecessary.
 |
| The tail of the Clouds Fly, complete with hooks secured with packing tape. |
 |
| Hook and Loop. |
Next, I attached hook and loop tape to where the wings meet together. I found the stock adhesive on the hook and loop to be inadequate for my purposes, so I applied glue to the adhesive surface.
The hook and loop weren't so much meant to provide structural support as the were to add an extra layer of protection to keep the wings bounded. This, along with the hooks and elastic bands, I felt provided a good balance between rigidity, transportability, and setup time.
A Solution for Takeoffs and Cameras
Although the Clouds Fly had been used before for FPV (First Person View) aerial photography, even using the same GoPro camera that DroneJournalism.org had, most configurations did not appeal to me for a number of reasons.
Many FPV enthusiasts, not just those using the Clouds Fly, place the camera in the "cockpit" of the glider. If the camera is small enough, servos are sometimes employed to allow the camera to pan to the left and the right, and even tilt down to offer a better view of the ground. More advanced FPV systems even have a live feed of the video to the pilot, which he uses to fly the aircraft, rather than observing it from the ground. But the primary objective of the FPV enthusiast is not to record the ground, but to provide the most accurate depiction of direction and heading -- as if a pilot were somehow in the aircraft.
FPV pilots sometimes elevate the cockpit camera for better ground coverage, but ultimately, the nose of the aircraft obscures view of the ground. Astute watchers of military drone technology will note that most of those drones employ gymbals and cameras in the nose of the craft, or beneath the craft, or both. Considering the likelihood of nose-in impacts with this prototype drone, then it would make sense for the camera to be placed on the underside of the fuselage.
At the same time this design solved a problem, it created another. Placing the camera on the underside of the drone would expose it to damage when the drone inevitably came in for a belly-landing. Additionally, a camera protruding from the base might make hand launching difficult.
After hand launching did prove difficult even without the bulk and weight of a camera, I decided to pursue a landing gear system that could solve both the camera and the launching problems simultaneously. That solution was a plate to which both aluminum camera gear, and a GoPro camera mount were attached.

A section of 3-ply birch was cut to fit the width of the fuselage. Aluminum landing hardware was sourced that was wide enough not to obscure the camera's field of view, and tall enough to grant adequate clearance when landing.

Following the advice of an experienced RC enthusiast, I did not chose to employ a wheel, as I was told that a misaligned rear wheel could make a straight takeoff nearly impossible. I instead used a metal piece of hardware normally used to hold up curtain rods. This was then glued to the rear end of the craft and secured with copious amounts of packing tape. The height of this curtain rod hook was enough to ensure that the control horn wouldn't scrape the ground and become damaged.
There were two immediate drawbacks to this design, as testing showed. One wasn't so much the design, but an oversight in execution. During several attempts at takeoff with the new gear, the drone would pivot on its wheels and nose down after gaining speed. This was evidence that the gear were somehow not placed in a correct position on the fuselage. Further researched proved this to be the case; most proper tail-dragging craft have the axle of the landing gear coincident to the leading edge of the wing.
Some RC enthusiasts have placed the landing gear in front of the leading edge of the wing without problems, but to put the landing gear behind the leading edge is asking for trouble. Fortunately, my landing gear axles were only slightly behind the leading edge, and the tipping effect was mitigated by moving the drone's center of gravity aft (I simply moved the battery closer to the rear of the craft).
The second drawback to the design related to the strength of the birch wood being greater than the strength of the fuselage. By looking through RC message boards, I gathered that one major complaint about all tricycle landing gear was how easy the gear could damage the aircraft in the event of a hard landing.
It wasn't uncommon to hear that the landing gear would rip out the entire floor of a wood aircraft if the landing was harsh enough. This would complicate rebuilding or even make a rebuild unfeasible. This did turn out to be a major issue for JournoDrone One, as I'll explain shortly.
A third drawback of trike landing gear is the penalty in both weight and drag, compared to a smooth-bottomed, hand-launched drone. It lessens maneuverability and decreases flight time. However, this was not an immediate drawback, and I was able to get the drone airborne regardless.
Last Moments
Only slight damage was visible after the crash, so minimal repairs were made to JournoDrone One, another attempt was made a week later without the camera. When the winds were favorable, I set up JD-01 in a new location and began to taxi the craft. But the drone never was particularly good at rolling on the pavement in a straight line, and I accidentally ran it into a curb. The landing gear separated from the drone and took a sizable chunk of the aircraft’s fuselage with it.
At this point, with all of the landing gear and much of the fuse missing, I didn’t see the harm in trying another hand launch. I ran to gather speed and then chucked the drone at an angle. The drone climbed from my hand, but either due to a steep launch angle, too much elevator, or not enough power, it stalled and impacted the ground. This was my final experience with the drone.
JD-01 now exists in pieces in the shop. Most all parts of the drone were salvageable and operable: the wings, all servos, radio receiver, motor, electronic speed controller, and battery were all fine. In fact, with some work, the fuse could probably have been repaired and made operable, too. However, that would have added even more weight to the drone, and I still would have questioned the reliability of the thing. And repairing the aircraft wouldn’t have improved its holding capacity at all. It simply made more sense to start again with a more capable airframe.
 Final Thoughts
DroneJournalism.org developers did not gain as much data and experience as we had originally hoped with JournoDrone One. But we did gain experience with fabrication, and with the nuts-and-bolts of the aircraft. Here's some of the biggest lessons we've walked away with:
- Hobby-Class is good, but not quite good enough. What we're trying to accomplish at DroneJournalism.org is a happy medium between the $50,000 commercial drone with all the bells and whistles, and the $500 toy. We don't need it to have all the capabilities and sensors of a warzone-ready drone. At the same time, it has to be able to take some abuse. We still believe it's a reasonable goal to start with hobby-class equipment, such transmitters, metal-gear servos, batteries, autopilots, and in some cases airframes. But what we're finding is that the standard foam and/or balsa craft simply can't cope with our demands. Yes, some of that can be blamed on inexperienced pilots. But journos we introduce to this equipment also will be inexperienced, and they need something that can take some punches. And we don't entirely chalk it up to pilot error, either -- our experience shows that some equipment and hardware can be damaged by anything other than light handling. We can start with a hobby-class airframe, but we need to at least strengthen it out of the box. This means reinforcing an existing hobby airframe with lightweight and high-strength material, or it could mean fabricating a simple airframe to spec, or preferably both.
- Drones must be serviceable in the field. Every time we had a setback, even a minor one, we were required to return to the bunker, and the drone would be down for days. This was not only due to the frailty of the small parts involved, but also because many parts could not be swapped out in the field. This means moving away from micro-sized components (such as tiny servos, small bolts and screws), and moving towards the kind of standard hardware you could find in a hardware store (bolts that are at least 3/16 in, hefty mounting plates). That also means substituting wood for metal, and plastic for carbon-fiber reinforced polymers. This obviously would increase the weight and size of these aircraft, but we feel that the enhanced up-time in the field would be well worth it.
- Landing gear, launching platforms are not an option. The mode of launch is a decision that balances the ease and reliability of the launch with the price, transportability, and complexity of the system. Small UAS for military applications and many entry-level hobby gliders are launched by hand, but this can be difficult to accomplish if you also are piloting the drone. A launcher might be a good investment as it reduces the chance for human error, but it introduces additional complications and comes with a severe penalty to transportability. Meanwhile, ground takeoff may be the easiest for beginning pilots, but the landing gear always comes with a weight and performance penalty, not to mention the problem of finding a suitable runway. Hand launch seems to be the best option, and that is the method we will pursue in the future.