

We almost had it. After months of research, development and heartache, DroneJournalism.org was about to have its very first aerial photographs. And while it wasn't going to be from a drone, these photos would be gathered easily and available instantly.
The balloon went up, the line went out, but something didn't seem right. And then... well, in short, on Wednesday, May 2, at approximately 4:00 p.m., we almost had it. What was it, exactly?
BALLOONS FOR PHOTOGRAPHY AND INTEL
Balloons are wonderful, simple things, and are particularly useful as platforms for aerial photography. The first time a balloon had successfully hoisted a camera for aerial photography was in 1858. That year, Gaspard Fe´lix Tournachon floated up several hundred meters in a tethered balloon and took photos of the French town of Petit Bicetre.
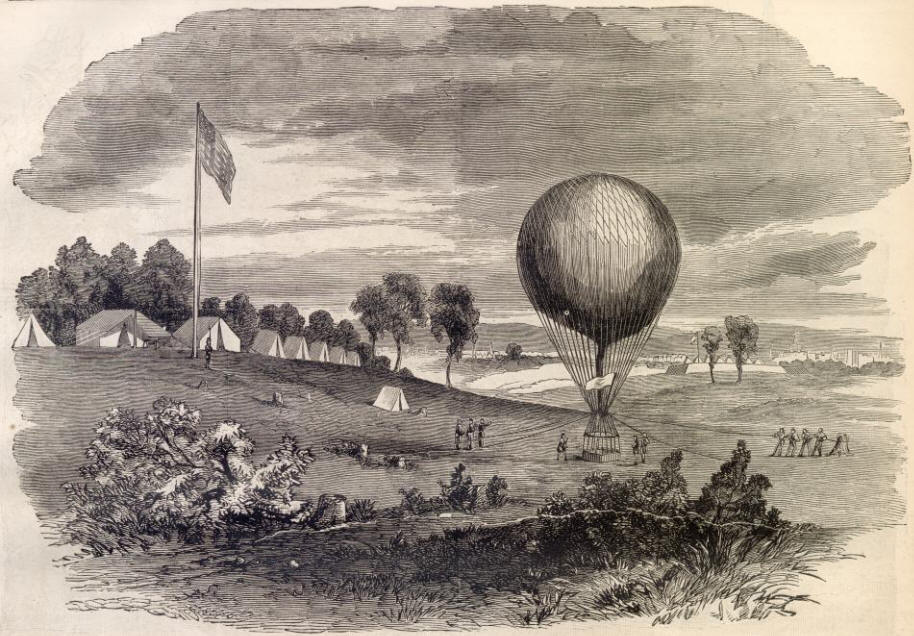 |
| Illustration of reconnaissance balloon from Harper'sWeekly, 1861. |
The South, however, lacked a sufficient supply of high-quality silk to produce balloons in any significant number. Desperate for the same quality of military intelligence as the North, the South resorted to asking the fine ladies of the Confederacy for their silk dresses to manufacture its first ever war balloon. The clothing drive succeeded, and the South eventually made two balloons.
That was, at least, until the Union took them both. Quoting a letter from Confederate Major General Longstreet, as recorded in Eugene Block's "Above the Civil War", where Longstreet describes the Union's capture of the first balloon:
"One day it was on a steamer down the James River when the tide went out and left it high and dry on a [sand]bar. The Federals gathered it in, and with it the last silk dress in the Confederacy. This was the meanest trick of the war"
Reportedly, he never forgave the Union. Fast forward 150 years, and balloons are still used in aerial photography. That's especially true for Small Format Aerial Photography (SFAP), which generally uses consumer-grade cameras that have shrunken and become more powerful and affordable in the last decade.
 |
| A series of PLOTS maps documenting habitats following the major BP spill in the Gulf |
Since then, the volunteers at PublicLaboratory.org have made aerial photomaps of Occupy camps in Oakland, monitored a superfund site in Brooklyn, and taken photos of the destruction of valuable forest in the Czech Republic. In April, PLOTS announced that Google had agreed to integrate the group's community-sourced photos into Google Earth.
DRONE JOURNALISM VS BALLOON JOURNALISM
DroneJournalism.org is primarily concerned with developing drones for journalistic inquiry, but the end product is no different than what is accomplished with balloon photography: current, detailed photomaps and aerial photographic intelligence. So it at least behooved me to research balloon photography and give it a try. That research left me with five basic conclusions about SFAP using balloons:
- In many cases, balloons are easier to deploy than drones. Drones require quite a bit of space to fly, are kind of noisy, and have propellers that can be rather dangerous given the right (or wrong) circumstances. Drones also can crash. Quite simply, balloons do not. There is less prep time with balloon photography than with drones, and when it comes time to fly, one only needs to inflate the balloon, secure it to the line, and let it float. When sufficient time has elapsed, simply retrieve the balloon. You don't have to be particularly skilled, but you do have to follow procedure.
- The weather requirements for both balloons and drones are very similar. Both should not be deployed in the rain, in high winds, or in otherwise inclement weather. Drones are able to negotiate stronger winds, but my research leads me to believe there aren't that many situations where you could fly a drone but not a balloon. Winds of 10 mph, I believe, is an appropriate wind speed maximum for deploying a balloon, whereas it might be 15 mph for drones. These are rough estimates, though, and balloon experts could provide better advice on this.
- The initial start up cost for balloon photography is considerably smaller than the start up cost of a drone. To get a proper drone with an autopilot, one might spend about $500. With savvy sourcing, one might deploy a photography balloon for $100 or less. The greatest investment will be the balloon, the camera, and perhaps the line, although there is more equipment required. Helium costs can add up after time, however, so balloon photography could actually end up costing more than flying a drone by the eighth deployment or so. Your mileage may vary.
- Nothing can beat a balloon for sustaining coverage over a fixed area for a considerable length of time. This, hands down, has to be one of the best features of balloons for aerial photography. Back before the 2012 Chicago G8 summit was cancelled, DroneJournalism.org developers were looking into deploying balloons to get aerial photography along the protest route. As the protest situation would change, we would recall the balloon and re-deploy at hotspots. But of course, the G8 summit was moved from Chicago, and those plans changed.
    (a) Except as provided in paragraph (b) of this section, no person
     may operate a moored balloon or kite-

     (1) Less than 500 feet from the base of any cloud;

     (2) More than 500 feet above the surface of the earth;

     (3) From an area where the ground visibility is less than three
     miles; or

     (4) Within five miles of the boundary of any airport.

     (b) Paragraph (a) of this section does not apply to the operation
     of a balloon or kite below the top of any structure and within 250
     feet of it, if that shielded operation does not obscure any
     lighting on the structure.
The regulation also says that the line mooring your balloon must have markers every 50 feet, starting at the 150th foot. However, the regs also stipulate that these requirements only apply to balloons with a diameter of 6 feet, or a capacity of 115 cubic feet. While your balloon may be smaller (mine was), I still recommend you follow the rules as if your balloon were 6 feet or larger.BUILDING THE JOURNOBALLOON
 |
| A diagram of the picavet system, from the KAPER E-magazine. |
This platform is called a picavet, and you can read more about how it works here. I made one using a cross of wood, steel eye bolts, lock washers, nuts, steel rings, and some brightly-colored line rated at 20 pounds.
The first step in the picavet construction was making the cross -- a simple enough job. I cut a portion of 3-ply birch hobby wood into equal lengths, marked the wood for proper placement, and glued the cross with Gorilla-brand glue.
The cross may have been strong enough to hang the camera, but it was still only 1.5mm thick, and it didn't inspire much confidence. From spare drone materials, I sourced two rectangles of carbon fiber cloth, cut to size.
 |
| The birch cross, right, and two pieces of carbon fiber, left, before bonding the two with epoxy resin. |
I'll explain the process of "skinning" items in carbon fiber in a later post, but for now, it will suffice to say that it involved saturating the carbon-fiber side of the cross with epoxy resin, letting that dry, and coating that in a final surface layer of resin. Because some (sharp) fibers of carbon were protruding from the cross, the next step was to cut off these strands and grind down the edges with a rotary hand tool.
 |
| Carbon fiber bonded to the birch cross. |
The non-CF side of the picavet was spray-painted in a combination of highly-visible silver and yellow.
Next it was matter of drilling holes for the eye bolts, and mounting the bolts with lock washers and nuts, and threading the line to suspend the picavet. The camera, DroneJournalism.org's trusty Hero2 GoPro HD, was strapped to the non-CF side using zip ties and hook and loop.
When you're designing aerial photography around a balloon platform, weight is critical, and the amount you can lift depends on the size of your balloon. If at all possible, cut the weight of the design. For example, I changed out the eye bolts from my original design with smaller bolts that weighted less but still provided enough strength to support the picavet.
The reel system was a simple, budget-priced fishing reel, fitted with fresh 30-pound test mono filament. As you will later read, it was the weak link in this design.
Weigh your components before flight, and pick the smallest balloon possible for your flight. This will make it easier to source helium and also keep the cost down. For the JournoBalloon, I sourced a latex balloon with a 3-foot diameter, and this set the limiting factor for the design. According to my sources, this 3-foot balloon could hold a maximum of 400 liters of helium gas (a little over 14 cubic feet), giving it a lift of 410 grams (0.91 pounds). The platform and camera weighed in at about 350 grams, meaning that it was light enough for the balloon.
With the picavet assembled and attached to the balloon and main line, it was time for a field test.
FLYING (AND LOSING) THE JOURNOBALLOON

Helium was sourced from a local party store. While the store didn't know how much their smallest tank held, they advertised it as being able to fill 55 balloons at 12" each in diameter. Each of those balloons would hold 14.83 liters of helium, meaning the tank would contain approximately 815 liters -- or enough to fill my 3-foot balloon twice.
I knew the balloon would lift the camera and picavet, and I knew I had enough helium to fill the balloon twice over, with some air to spare. But how would to accurately gauge when the balloon is properly inflated? It's not easy to measure the diameter of a balloon. One can, however, approximate the circumference of a fully-inflated balloon.

For my balloon, this meant multiplying 36 inches by 3.14, which works out to 113 inches. I cut a line to that length, and kept it for measurement. I stopped periodically when the balloon neared its full size, and measured the circumference of the balloon. By the time I had stopped filling the balloon and reached the proper measurement with the line, it had begun to exhibit some classic deformation near the nozzle that indicated it was beginning to be overfull.
As a test, I gave the balloon just a little slack and let it carry the picavet out of my hand. It lifted without any effort. It was time to deploy.
 |
| A 2008 satellite image of the portion of the UI Arboretum used for the JournoBalloon maiden. |
The site chosen for the maiden JournoBalloon flight was the University of Illinois Arboretum, which apart from being a gorgeous park with beautiful flora, is a botanical "living laboratory" for UIUC students and researchers. Should the first deployment go well, I thought, I'd return periodically to take aerial photos and track plant growth over time.
I approached the Arboretum from the southwest corner, set the GoPro to take a still photo every 5 seconds, and slowly let the balloon out. Although the wind was only gusting at about 5 mph according to the local weather service, it was bucking the GoPro to the extent that I doubt any good photos would be taken. I increased the altitude, which would generally allow the platform to escape turbulent ground air and stabilize somewhat.
But as I reached what felt like the end of the line on the reel, I was disappointed at the maximum altitude of the balloon. Apparently, the gauge of the mono filament was large enough that it reduced the length of line that could fit on the fishing reel. This should have been obvious to me as I spooled the reel, but it didn't register at the time. I couldn't accurately gauge the altitude of the balloon, but it couldn't have been more than 50 feet above the ground. To get the kind of photos I was looking for, I needed to be near 300 feet.

Figuring I had reached the top altitude permitted by the line, I thought it would be best to walk the perimeter of the Arboretum to expand the survey area. But as I walked to the northeast corner and then tried to retrieve the balloon, disaster struck. The knot holding the end of the line to the reel, which was difficult to tie given the diameter and characteristics of the monofilament line, let go. The end of the line left the reel, and the balloon headed for the clouds.
LESSONS LEARNED
Two things can happen to a free-flying weather balloon. Generally, it will gain altitude until the air becomes very, very thin. The pressure differential between the helium balloon and the thin atmosphere adds additional pressure to the balloon. The balloon expands until it pops -- in the case of this 3-foot balloon, perhaps between 60,000 and 80,000 feet. The journey, from release, to pop, to landing, could have taken between 2 and 4 hours.
According to a balloon trajectory calculator from the the University of Wyoming's Department of Atmospheric Sciences, which factors in the global wind forecast, the balloon's trajectory may have looked something like this:
 |
| The U Wyo calculator's KML output file - as visualized by Google Earth. |
True to the forecast - I witnessed the balloon travel north. According to the calculations, the camera (or what's left of it), could be in a cornfield near Penfield or Armstrong, IL. That would put it about 20 miles from the launch site.
But sometimes that doesn't happen. If the weather balloon isn't adequately inflated, it may not reach the altitude necessary to pop. A balloon like that could drift for days as it gradually leaks enough helium to come back to earth.
Having said all that -- this wasn't meant to be a free-flying balloon. Here's some conclusions from this experience that may help future balloonists avoid the same fate as JournoBalloon 1. Consider these mistakes, listed in order of stupidity:
- Don't tie a $300 camera to a $15 fishing reel. This is completely an example of the $.09 bolt dooming the $90 million aircraft. The limitations of the fishing reel meant that not only was the line (and therefore the altitude) inadequately short, but that the entire system relied on one knot holding everything together. A better system would keep enough line on the reel so that you would never hit the knot. Paul Illsley, an expert on digital mapping and a former image specialist for NASA and National Geographic, has some good examples of reel systems. This philosophy also extends to the fishing line used -- instead of a 30lb monofilament that doesn't want to knot up, the better solution would have been 100lb Dacron fishing line or similar. These items are more expensive, but it's less expensive than losing a GoPro.
- Go for a cheap camera on the first couple of tries. Just in case your knot-tying isn't up to par, or you haven't figured out all the kinks of balloon photography, don't use the $300 GoPro. You can get some very good results from a $35 camera (in fact, PLOTS recommends a similar solution), and you won't have the added risk or unease. You can step up your equipment as your game improves.
- Always include identification with your balloon. Worst case scenario, you will lose your balloon and whatever payload it is carrying. But the monetary value of that loss might actually be minimal compared to the value of the images lost. So include some identification on the rig. I had a clear PVC business card that I meant to stash somewhere in the balloon, and got carried away and skipped that step. Another option is writing a simple TXT file with contact information to the camera's SD card, or taking a photo of a business card or other printed text before launching the camera. If you can find a lightweight GPS unit with a Ham radio transmitter, or even a rigged smartphone that can message its coordinates, that might make all of the difference.
Acton handled it very well. I bought us a couple of pitchers of Guinness, and produced the new camera, before I told him I'd lost the old one. "I figured something like that would happen," he said, laughing. I told him that it probably would have happened to one of us, but that didn't mean I didn't feel horrible about it.
The JournoBalloon remains at large. We haven't heard hide nor hair of it, but my fiancee did set up a Craigslist add in the off chance a farmer would be browsing. She has dubbed the balloon experiment HindenDrone.
Reportedly, the National Weather Service only recovers less than 20 percent of its weather balloon payloads-- and all of those are launched in pre-addressed, postage-paid packages, so we don't have much hope for our own balloon.
Nevertheless, on the off chance that someone finds the camera while working in their cornfield, they'll get some amazing photos.
